
Photography guide
Gorilla photography tips: settings, lenses and etiquette for the forest
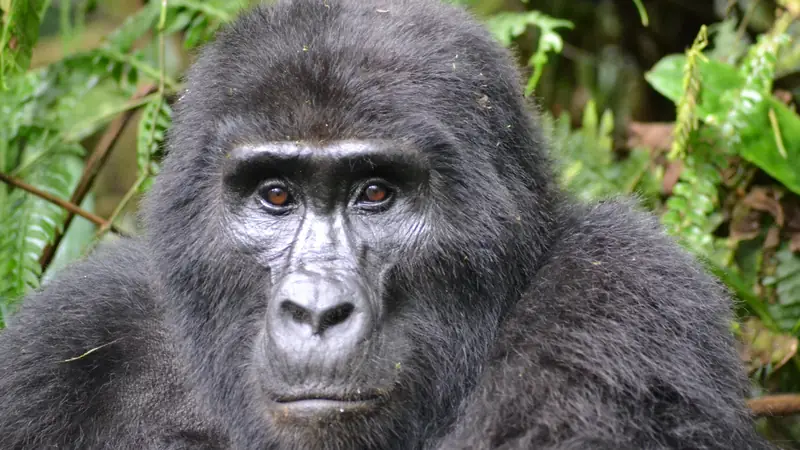
These gorilla photography tips will help you take sharp, honest pictures in a dark forest. Use a fast lens, raise your ISO, keep the shutter quick and never use flash. This guide covers camera settings, lenses, phones, low light, rules and ethics.
Gorilla photography tips: the quick answer
These gorilla photography tips come down to four things. Use a fast lens, raise your ISO, shoot at a quick shutter speed and keep your flash off. The forest is dim and the gorillas are dark, so exposure is the main challenge.
You will have one hour with the gorillas, and the clock starts when you arrive. Prepare your camera before you reach them. Then enjoy the hour, and do not hide behind the viewfinder the whole time. For general kit, see our gorilla trekking packing list.
The challenge of photographing gorillas
These gorilla photography tips start from a simple fact. Photographing gorillas is harder than most visitors expect. Black fur absorbs light, and the forest canopy blocks the sun. Foliage often sits between you and the animals, so autofocus can struggle.
The gorillas also move. A silverback may sit calmly for minutes, then a young gorilla bounds past. You need to be ready for both quiet portraits and quick action. Rules add another limit, because you must keep your distance and avoid flash.
Camera settings for photographing gorillas
Start with these gorilla photography tips on settings, then adjust to the light.
| Setting | Try this | Why |
|---|---|---|
| Mode | Aperture priority or manual | Gives control over depth and light |
| Aperture | f/2.8 to f/5.6 | Lets in as much light as possible |
| Shutter speed | 1/250 second or faster | Keeps moving gorillas sharp |
| ISO | 800 to 3200 | Modern cameras handle high ISO well |
| Focus | Continuous autofocus, single point | Locks onto an eye |
| Exposure | Plus 0.3 to 1 stop | Stops black fur from turning muddy |
| File format | RAW | Lets you recover shadows later |
Check your results often during the first minutes. If images look too dark, raise ISO before you slow the shutter.
The best lens for gorilla photography
Among gorilla photography tips, lens choice depends on your distance. Rangers keep visitors about 10 metres away in Uganda and 7 metres away in Rwanda, though gorillas sometimes wander closer. Because of that, a very long lens is rarely needed.
- 70-200 mm f/2.8. A classic choice. It is fast, sharp and flexible.
- 100-400 mm. Useful for tree-top gorillas, though slower in low light.
- 24-70 mm. Good for close encounters and forest scenery.
- A fast prime. A 85 mm f/1.8 gives lovely portraits when gorillas come close.
Choose one main lens and one backup. Changing lenses in a damp forest invites dust and moisture.
Not sure which dates suit you? Send them to us and a named member of our team will check.
Photographing gorillas with a phone
These gorilla photography tips also work with a phone, because modern phones can take good photos. Turn off the flash, and wipe the lens clean. Tap on the animal's face to set focus, then slide the exposure up a little.
Avoid heavy digital zoom, since it softens details. A moderate optical zoom, if you have one, works better. Many phones also have a night mode that helps in the shade, though moving animals can blur. Use a waterproof pouch or case for rain.
Low light and shooting in the forest
The forest is the true challenge. Even on a sunny day, the canopy leaves you with dim, patchy light. Rain and cloud make it worse.
Use the light you have
Look for gaps in the canopy where light falls on faces or fur. A gorilla in a pool of light makes a far stronger photo than one in deep shade.
Work with ISO and noise
Do not fear high ISO. A grainy sharp photo beats a clean blurry one. Software can reduce noise afterwards.
Composition ideas for gorilla portraits
The best gorilla photography tips are about patience. Watch behaviour, and wait for the moment.
- Eye contact. Focus on the eyes, and keep them sharp.
- Family moments. Mothers with infants and playing juveniles make touching scenes.
- Context. Include foliage and trees to show where gorillas live.
- Hands and faces. Close-ups of expression add variety.
- Action. Feeding, climbing and chest-beating tell a story.
Shoot a few wide frames, too. A photo of the whole group in the forest gives scale and place.
Rules for gorilla photography
Good gorilla photography tips always follow the rules, which protect the animals and keep the encounter calm. The Uganda Wildlife Authority and the International Gorilla Conservation Programme both publish visitor guidance.
- No flash. Flash can startle gorillas and harm their eyes.
- No drones. Drones are not allowed over the gorilla areas.
- No chasing. Never move closer to improve a shot.
- Keep quiet. Turn off camera beeps and keep your voice low.
- Follow your guide. Rangers may ask you to stop or step back.
Full details are in our gorilla trekking rules and etiquette. In short, a respectful distance is more important than any photo.
Protect your camera in rain and mud
Forest weather is wet, and mud is everywhere. Carry a rain cover or a plastic bag with a hole for the lens. Use a dry bag for spare gear and silica gel packs against moisture. Keep a soft cloth to wipe lenses.
Wet-season treks need extra care, and our guide to gorilla trekking in rainy season covers more wet-weather gear. Bring spare batteries, because cool and damp air drains them quickly. Carry extra memory cards, too.
Carrying gear on the trek
You walk for hours, often on steep ground, so travel light, as our difficulty guide explains. A small daypack with one camera, one main lens and water is enough. Porters can carry your pack, and they often help hold equipment while you climb.
Rangers may ask you to leave large bags and tripods behind at the start of the hour. Many photographers use a monopod, or they rest the camera on a tree. Ask your guide first. Avoid bringing heavy tripods, since the forest floor is uneven.
Not sure which dates suit you? Send them to us and a named member of our team will check.
Photography ethics and sharing your images
Good photography respects the gorillas and the people who protect them. Never stage a shot, and never get close for a selfie. Ask before photographing local people, and offer to share the image.
When you post your photos, tell the true story. Mention that gorillas are wild and that rules protect them. Your pictures can inspire others to support conservation, and they can encourage responsible travel. Read about how permits support protection in our gorilla permit booking guide, and plan your trip with our trek planning guide. The Bwindi guide describes the forest where many of these photographs are taken.
Editing and sharing your gorilla photographs
Among gorilla photography tips for editing, a light touch is best. Editing can lift a dark photo. Raise shadows gently, add a little contrast and reduce noise. Keep the colours natural, because black fur should still look rich.
Crop with care, and keep the eyes sharp. Back up your files that evening, since memory cards fail and phones get lost. Print your best image and enjoy it at home. Many travellers say the print becomes a lasting memory.
Gorilla photography tips for beginners
You do not need a professional kit. A simple camera and a calm approach already give good results. Follow these gorilla photography tips if you are new.
- Use a zoom lens, and set it before you arrive.
- Choose auto ISO with a maximum around 3200.
- Shoot many frames, because many will be blurred.
- Look for the eyes, and focus on them.
- Take a break from the screen, and simply watch.
Beginners often make one mistake. They spend the whole hour behind the camera. Put it down for a few minutes, and enjoy the real thing.
Gorilla photography tips for video
Video captures movement and sound, so it suits gorilla encounters. Film at 25 or 30 frames per second, and use a shutter speed about double the frame rate. Hold steady, and let the subject move.
Turn off any beeps, and keep the sound natural. Short clips of 10 to 20 seconds are easier to edit than long takes. Shoot a few wide scenes, a few close-ups and a few of the walk. A handheld stabiliser or a monopod helps, if your guide allows it.
Light by time of day and season
Light changes with the hour and the weather. Early treks start in cool, dim conditions. By mid-morning, gaps in the canopy let in more light, so photographs look better.
Dry months bring brighter days, while the wet months bring soft, diffuse light. Cloud can reduce harsh shadows, but it lowers brightness, so raise your ISO. For planning around the seasons, see our guide to the best time for gorilla trekking.
Uganda or Rwanda: which suits photographers?
Both countries offer superb photography. Rwanda's viewing distance is 7 metres, and Uganda's is 10 metres, so Rwanda can feel slightly closer. Bwindi's dense forest often means dimmer light, while the Virunga slopes in Rwanda and Mgahinga can offer more open views, though conditions vary day by day.
Rwanda also has shorter drives from Kigali. Uganda has more sectors and more gorilla groups to choose from. Read our Uganda or Rwanda comparison to decide, and ask us for advice on your photography goals.
Not sure which dates suit you? Send them to us and a named member of our team will check.
Photography etiquette with other visitors
You share the hour with up to seven other people. Be considerate. Take turns for the best viewing spots, and keep your lens out of other people's way. Never block the view, and never push forward.
Keep your voice low, and avoid long conversations. If a gorilla comes close, stay still. The best shots often come to patient people. Our page on whether gorilla trekking is safe explains how to behave when gorillas move near the group.
A gorilla photography tips checklist
Use this table to prepare in three stages.
| Stage | What to do |
|---|---|
| Before the trip | Test your gear, charge batteries and back up your cards |
| The night before | Set your camera, clean lenses and pack a rain cover |
| On the trail | Keep the camera dry and ready, and protect the lens |
| With the gorillas | Shoot in bursts, watch the eyes and enjoy the moment |
| After the trek | Back up files, edit gently and share responsibly |
Print or save this checklist, and you will feel calm and ready. For clothing and bags, see our packing guide.
Plan a photography-friendly gorilla trek with us
We are a licensed Ugandan operator. Tell us you are a photographer, and we choose a sector, a lodge and a pace that give you the best chance of good images.
- Tell us your kit and goals. Send your dates or message us on WhatsApp.
- We suggest sectors. We consider terrain, light and walking time.
- You get one clear quote. It lists every inclusion.
Our Uganda gorilla trekking and Rwanda gorilla trekking guides help you compare.
Frequently asked questions
What are the best camera settings for gorillas?
Try aperture priority, f/2.8 to f/5.6, a shutter speed of 1/250 or faster and ISO 800 to 3200. Add a little exposure compensation for black fur.
What lens do I need for gorilla photography?
A 70-200 mm lens is a popular choice. Longer lenses help in the trees, and a wide zoom suits close encounters.
Can I use flash on a gorilla trek?
No. Flash is not allowed, because it can startle the gorillas.
Are drones allowed for gorilla photography?
No. Drones are not allowed over the gorilla areas.
Can I photograph gorillas with my phone?
Yes. Turn off the flash, tap to focus on the face and avoid heavy digital zoom.
How long do I have to take photographs?
You spend one hour with the gorillas. Prepare your camera before you arrive.
Can I bring a tripod?
Usually a monopod or tree rest is easier. Ask your guide, because rules and terrain vary.
How do I protect my camera in the rain?
Use a rain cover or a plastic bag, a dry bag for spare gear and a cloth to wipe the lens.
Ready to trek? Ask for your quote.
Keep planning